
Creating Doom in Unreal Engine 4
- Samuel Joyce

- Aug 12, 2019
- 12 min read
Updated: Jun 8, 2022
On the 10th of May, I started my journey in attempting to reverse engineer Doom (1993) into Unreal Engine 4.
First Steps - Recreating the Doom gameplay
My first task was to focus on creating the sprite system. After some time researching how to approach this I landed on Master Neme’s YouTube channel which detailed their journey.

After getting the most iconic sprite sheet of the Imp, the first humanoid you’ll meet near the end of E1M1. I found out Unreal can extract sprites for you, while this is useful, I found that some of the sprites were slightly different sizes causing very slight offsets. Considering this problem, I decided to extract them manually in Photoshop to ensure maximum accuracy.

Now I have the above folders set up, I’ve gone ahead and created the flipbooks I want.
My next step is to get these flip-books onto an Actor and see what they look like in-game! Dragging the actor into the game, adding some target NAV points down and iterating through each of these randomly I had the Imp running about. My biggest complaint with these NAV points is how robotic they look. I began searching for my solution to the problem, finally settling on using the NavMeshBoundsVolume.
From here I used navigable radius points and moved the actor there. I found quite a few problems with using “simple move” as I wasn’t able to decide what to do if I failed or finished moving.

Next up I needed the sprites to always face the player as the rotating 2D sprites looked bizarre and sometimes invisible depending on which way they were moving. This is where Master Neme’s YouTube tutorials came in handy, they had created a whole system to handle how this should be managed. First of all, you would want to calculate what angle the player is compared to the enemy. Through some complicated maths, we get the locations of both the player and NPC, then the NPC’s forward/right vector then find the dot product to return the angle between the two locations. From here we can use a long set of branches to see the angle the player is on, as we have 8 different directions we need to change the sprite on each 22.5° up to 180°.

From here we use an enum to store the state the flipbook should be in and feed these into a select function. Set this! Now as you astute readers might have noticed, the Imp only has 5 directions, the other three are excluded, great memory savings! Because of this, I have done a quick string scan to detect whether or not the flipbook angle is Right or not then rotated the sprite accordingly.

The Result!

My last bits of work on the Imp at setting up the firing mechanics, implementing some AI so the enemy can idle/move or shoot, spawning a corpse on death, and finally having the enemy become stunned when shot (this was interesting as I had to work out how to interrupt and cancel their current action).
From here I set up similar bits for the player, such as the UI, scoring, and shooting flip-book using the classic Pistol as the player’s first weapon. One of the biggest improvements I made here was the movement sway when moving, I studied closely how they moved in the original game and managed to replicate a very similar looking effect that bought a lot of life to the game.
Level Art - Adding a splash of art
Choosing the level art & direction was a tough one for this game. I would have liked to have reused some of the Doom assets, but I wasn’t quite sure that would fit my idea. While the Doom textures would look more in line with what I’m basing my game off, I don’t think the simplicity of the art would do my game justice. I trialled this with a few different hallways and found the textures were a bit too noticeable repeating. This isn’t a problem in Doom as the player may only go through these areas once or they are uniquely shaped to make an interesting environment. In this game, it’s a bit more of a problem, if the player is seeing repetitive things it’ll drag the enjoyment factor down.
I started looking at the Modular Sci-Fi Season 1 Starter Bundle and Industry Props Pack 6 and dissecting this into something space that could help reduce the tedium. I settled on this below for now:

I decided I wasn’t keen on this; it looks too artificial and made by a non-artist. I need to find something that would suit the Doom game elements like the UI, weapons and enemies. Although I loved putting together the oil spill, I know there is a lot more I could have done with a lot more work. I decided to take to Google to find some new ideas and eventually landed on the Epic Games Launcher’s own Sci-Fi Bunk under the learning tab. This Sci-Fi Bunk was created by Liam Tart and gave me some superb inspiration on what exactly I wanted to see. This project became my choice of environment, I took the space scene outside of the window and decided to use it.
One of the models that stood out was the satellite. I thought I could use this as an interesting kind of level piece for the play area. I put together some nav mesh and spawning bounds and gave it a try, this looks great! The imps were running around on the satellite and I was happy. One of the problems I found with this mesh was there was a collision that stick out and hampered moving around on it so cleanly. Thankfully the mesh came in separate pieces and I was able to restructure it to make it look more like a dragonfly with a smooth base to run around on.
My idea swiftly changed from a temple run style corridor that constantly spawned in front of you. The idea morphed into having the player run across the satellites from the Sci-Fi bunk and once the player gets to the end, they would be able to jump point to point to the next satellite. Here things got interesting, I started learning about the new technique where I would have to use the blueprint SuggestProjectVelocity.

One of the problems I was having straight off the bat with this blueprint was the trace option. I didn’t fully understand what this did, I assumed it was for visual debugging purposes and set it to Trace Full Path. This was a tin of worms that caused me to have problems with this for a while. Finally, after disabling that, putting in two locations, I was able to launch the player in a nice arc. This concept worked, running along the satellites was fun and getting to the end, rather than a jarring teleport-in level, the player felt like they were dynamically moving to their next location. My next problem started when I wanted to add some variation to the satellites, there wasn’t an interesting actor friendly solution I could come up with as the toss velocity was always quite similar and could easily overshoot if the mesh was rotated even a small amount.
I moved away from this idea and decided to use Matinee to orbit the satellite around the centre area. This meant I would be able to use Sci-Fi bunk again as some inspiration and try and make the most of the view of the place. I started searching for a StarTrek-Esq control deck mesh for the player to be able to run around in. I found this inside the Modular Sci Bundle as part of the Modular SciFi: Command Centre. My new result ended up something like this:

This looks much better and with some movement of lighting and adding some outer planes to prevent lighting from bleeding in, I was able to get something that looks realistic.
Triggers - Adding in the functionality
What exactly do I want to have the player trigger? Below is a very early design I had in mind, the player would start in the middle, and choose a direction that the level I wasn’t initially keen on shown above would spawn in. The player would run across and kill the enemies, once they read the end a new trigger would fire off, moving the level forwards.

Now my design choice has changed it's much easier for me to get the player flow to work smoothly. I decided to go with a teleporter like how Doom transports its players. Below is a squashed security camera mesh with a little material that would flicker on and off. I was able to take this time to create an emitter for the portal and a suction effect. One of the problems I had here was that the suction effect was considered a GPU sprite and could not be added to the teleporter blueprint, thus was added separately. I used the fantastic UnrealCG to learn how to create this.

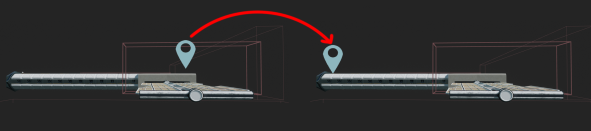
So how does this teleporter work? This was the easy part, I just needed to find the satellite in the level, I was only using one GetAllActorsOfClass was a quick way to get access to the locational data I needed. As I already had “jump points” made from SceneComponents on here that I wasn’t using anymore, I decided to convert them to location storage points. Once I had the teleporter detecting only the player. As a future optimisation, I can look at adding this function to the level blueprint with a direct reference to the teleporter.
I wanted to recreate the 3D Widgets from Doom 3. You were able to access a computer and run your cursor along with the screen as if you were controlling the mouse. To recreate this, Unreal Engine 4 has a great widget system already to allow for. Albeit it's not accurate straight out of the box but the solution was enough to get what I wanted. One of the most important factors with a 3D widget
Creating the trailer - Making it fun
I used Adobe premiere and decided to base my trailer on the new Official E3 Doom Eternal trailer. I have previously made a trailer for my other game Idle Sands but I didn't think this trailer was too fun to watch. While it was informative on everything I had created it didn't showcase what was fun about such a simple game. One of the first tasks I set for myself was ripping some of the voice audio from the trailer and then adding it to the start of my video. This was simple, I just used a YouTube to MP4 website and downloaded the file, flung it into my project, unlinked the video from the audio then snipped the 4 seconds of voice audio I needed. There is a second voice clip I wanted halfway through the video, “It is their time to give penance”. I had to have this second part so I could have a nice build-up. My next task was to find and convert the available .ogg Doom music files in Adobe Audition to make them compatible. Now they are the .wav file type it was simple to drag them in and get used. In the end, after listening to the soundtrack I decided most of the original music wasn’t modern enough to produce the momentum I needed. I settled on the newly released DOOM II - Into Sandy's City Remake and Doom - At Doom's Gate E1M1 remake by Andrew Hulshult.
Creating the Logo:
To give my trailer the most authentic look I needed to develop the original logo from scratch. I didn't want to simply copy and paste the Doom logo into Photoshop then chop together in a similar font the word Idle and attach it. To start with I needed to find a way to type out the initial words in the exact font used in the game. I tried a tool called Doom Writer but instantly because of a problem from a user experience point of view, I had to relearn another tool that I would only need to use once. The results weren’t what I needed so I searched for a new solution.
Enter AmazDoom. This font set created by AmazingMax provided a perfect baseline for me to carefully craft the logo in Photoshop. Putting it together initially looked the part, but I wanted the texture and effects to go alongside it. From here I found a tutorial by a renowned YouTuber Nathaniel Dodson who runs his channel, tutvid and specialises in Photoshop tutorials. Thankfully he had a quality, 1 hour 22 minute long, tutorial on how to create the Doom Logo. It took me a day to go through the whole tutorial as I had to do 8 letters rather than 4 which is twice the amount of work done in the video.

The initial start of the video, creating a 1200px font using the AmazDoomLeft font to start with, DOOM. A clever trick to get exactly what we want to be explained in the video, selecting the OOM and swapping this to the AmazDoomRight font. Further adjustments to the font itself using Path Selection Tool then shortening certain letters, accentuating features such as the points on top of the letters, reducing distancing between letters and creating a new 3D extrusion.
Already the DOOM logo is starting to look exactly how I needed it. The work hadn’t stopped here, I was only part way through the tutorial, next up rotating, and re-positioning the letters. From here there was a lengthy process of creating individual masks for each face of the letter, bevels and extrusion. This was a clever part of the tutorial that made the workflow much faster and automatic as it allowed for specific choosing of individual areas of the logo.
I thought this might have been it, but I was completely wrong. The work had just started, the texturing task of the letters was easily the longest and took up a huge portion of the tutorial. Below is a small progression image I was able to put together using the many folders/layers/masks that were available on the Photoshop document.

My final task now the logo is finished I needed to put it on a suitable background. At first, I thought an in-game shot would look great. I positioned some sprites into the main play area with the sun and planet in the background. Tweaking some sprite animations and adding a few fireballs from the imp’s hand. Finished!

My main problem with this was that it looked like an in-game screenshot, one that would you show off on a Steam store page while I needed something that represented an end of trailer screen, something fun with animations. Once again, I needed a modern approach to capture the interest of the audience and give them something easy to recognise. The E3 Doom trailer had this perfect scene where the developers recreated the Doom cover art with the space marine being atop corpses fighting off demons. I ripped this from YouTube and sliced it up in Adobe Premiere, adding some flavour information to emulate a real game and this is the result:

Post-processing and anti-aliasing are available in the engine, which is all enabled by default, this presents a few frustrating issues. One of the problems in my case was movement causing the sprites to flicker, I wasn’t sure quite what was wrong here, disabling post-processing altogether fixed the problem. Not ideal as we lose post-processing on the whole game. Another issue that was occurring looked a bit like redrawing causing the sprite to have a slightly transparent quality when the player is moving. Looking through the project settings showed the anti-aliasing method to be set to Temporal AA, switching to MSAA didn’t appear to do anything, and FXAA was the saviour in this situation.
Optimising the Blueprints
Its been a long hiatus for me since I last worked on this project. Coming back in with a fresh mind, completely lost in how I created all the systems I began looking at my blueprints to work out how I created it all.
One of the first things I noticed was that I use a lot of string searching to find out where my characters are at. For example, when changing sprites, I would get the display name of the current flipbook and search for keywords, such as “Attack”, “Stun” or the word “Right”. This was a working system initially but not at all optimised. I decided to test out using the enumerators I already had in my system to do these things for me. I already know what state my entities are in at this point so I thought why to bother searching a string when I know it will be one of these values already.
To find out how long each blueprint was taking I took to Google and find a good solution. As below, it’s a simple and tidy way to get the lowest possible results printed to the screen and any other is sent to the log.
Settings that make sprites function correctly within a 3D Environment.

Below is a great example where I have removed searching a string. It looks much tidier to look at and lets other leering eyes understand what exactly is inside the enumerator without having to look. Profile testing showed that the searching string, combined with 5 entities was costing between 0.004 to 0.012ms per run which would only escalate once more entities started appearing on screen at the same time.

Below is the optimisation. Profiling resulted in a much more controlled range costing between 0.002 to 0.005ms. This is one of the small optimisations I’m making.

The next optimisation I wanted to take is how I update sprites on the screen. With the current setup of the blueprint, if you were an entity you would be part of the code on a global scale which is extremely inefficient. I decided to find a simple method of detecting whether an entity is within the player's view. Profiling showed initial results were around 0.004 to 0.014ms. These results never changed when looking away indicating the code was still running for every sprite globally. Once the new blueprint in the red square was added, the newer results were much more controlled with the biggest difference being, that when no entities on the screen there was a huge improvement costing just 0.0003ms.

The next optimisation is looking at where I’m casting. First, I want to see how much of a performance dip you get when you cast an entity, then set it to a variable before using it.
I set up a small test as pictured below that would prove in a real scenario, I have occurred throughout my blueprints how different performance I will have. I used an Is Valid node so I can do something with my get.

The results are very surprising. I knew that casting was expensive, but I never knew it would be 4 times more costly. Incredible! Now I just need to find all the places I cast and swap them to be pre-casted on start up.
Set of Results:

Upcoming:
Shop system with new weapons
Making the jump to level 2
Creating the ally to aid the player


Comments